
How to create an alpha mask in Sketch
Learn how to work with alpha masks for smooth designs
Have you been wondering what an alpha mask is or how to create one? We’ve got you covered! In this blog post, we’ll go over some definitions and use cases, then walk you through how to make use of alpha masks — step by step.
Let’s get started!
What is an alpha mask?
Before we explain alpha masks, let’s first talk about outline masks — which are a little more common and easier to use.

Outline masks have defined edges, while alpha masks let you play with opacity.
Outline masks only show parts of a layer or multiple layers that fall within its shape. Alpha masks, on the other hand, hide anything that falls outside of their shape by controlling the transparency (alpha) of the area they’re masking. This makes them great for creating smooth borders and fading out layers.
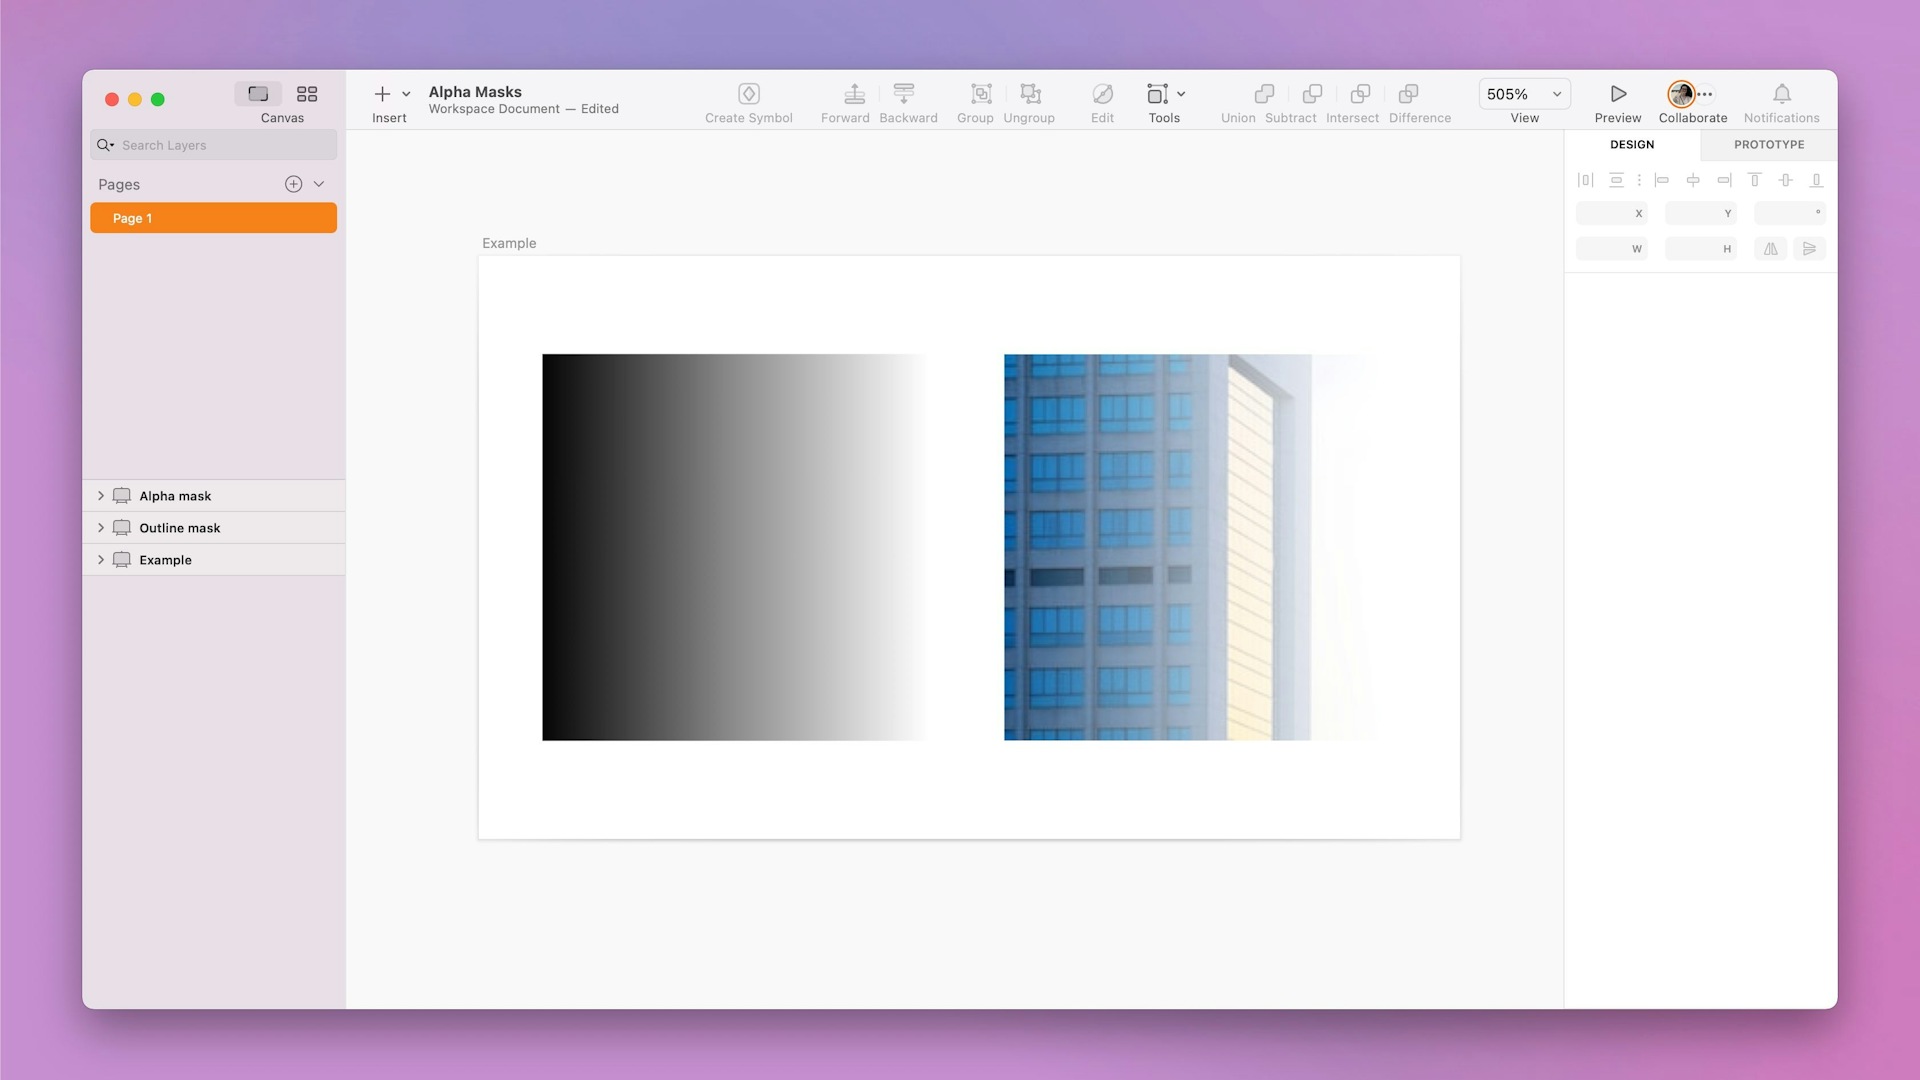
Using any shape with transparency as an alpha mask will make what it masks transparent as well.
To play with a shape or layer’s transparency, you can head to the Inspector and play around with blurs or gradients.
How to create a smooth border using alpha masks
By decreasing the opacity around an image layer, you can blend it more smoothly into your design’s background. Today, we’ll use the example of an avatar image.

As you can see, we’ve given the avatar a blurred border to help smoothen out the difference in color between the image and the background.
You can use your own image file or have Sketch generate one for you. To do this, select Insert > Data > Sketch Data > Faces and place it on your Artboard. Then, press O to trigger the Oval tool, and click and drag to cover the center of the image.
Now, let’s add some transparency to our mask layer. Head to the Blur section of the Inspector and give your oval a 2 px Gaussian blur. A mask layer will affect any layer above it in the Layer List, so you’ll want to rearrange your layers accordingly. For this example, move the oval so that it’s below the image layer.
Select the oval and press ^⌘M or Control-click on the layer and select Mask Image from the menu. Now, because the layer already has transparency, Sketch will automatically set it to be an alpha mask. You can always turn it back into an outline mask by selecting Layer > Mask > Mask Mode from the Menu Bar.
And there you have it!
When working with alpha masks, be weary of straight edges peeking out. We recommend sticking to 3 px or less.
How to create a fade-out effect using alpha masks
You can decrease the opacity of one end of your layer or group to fade it out. This is useful for creating scrolling effects for your mockups or prototypes. It can also come in handy when editing images. For today, we’ll be applying it to a comments thread we borrowed from a Sketch 101 assignment.

In this example, we’re fading the last comment so that it’s ‘hidden’ behind the comment box.
To create this effect, we’ll follow almost the same steps as before. Cover the layer — or group of layers — you want to mask with a shape. Then, head to the Style section of the Inspector and apply a linear gradient fill to your shape. To give you a visual reference, you can change the top point to black and set the bottom point’s alpha to 0. Then, drag the top point down until you’re happy with the result. This will create bottom fade-out, but you can play around with it.
Before masking, make sure your shape is beneath the layers you want to mask in the Layer List.
Here you can see a few layers disappeared when we applied the mask. To bring them back, Control-click on the missing layers and select Ignore Underlying Mask.
And done! We hope this gave you some ideas about how to use alpha masks for your projects. If you end up creating some sleek design, share it with us using the #MadeWithSketch hashtag. We’d love to see it 😉


