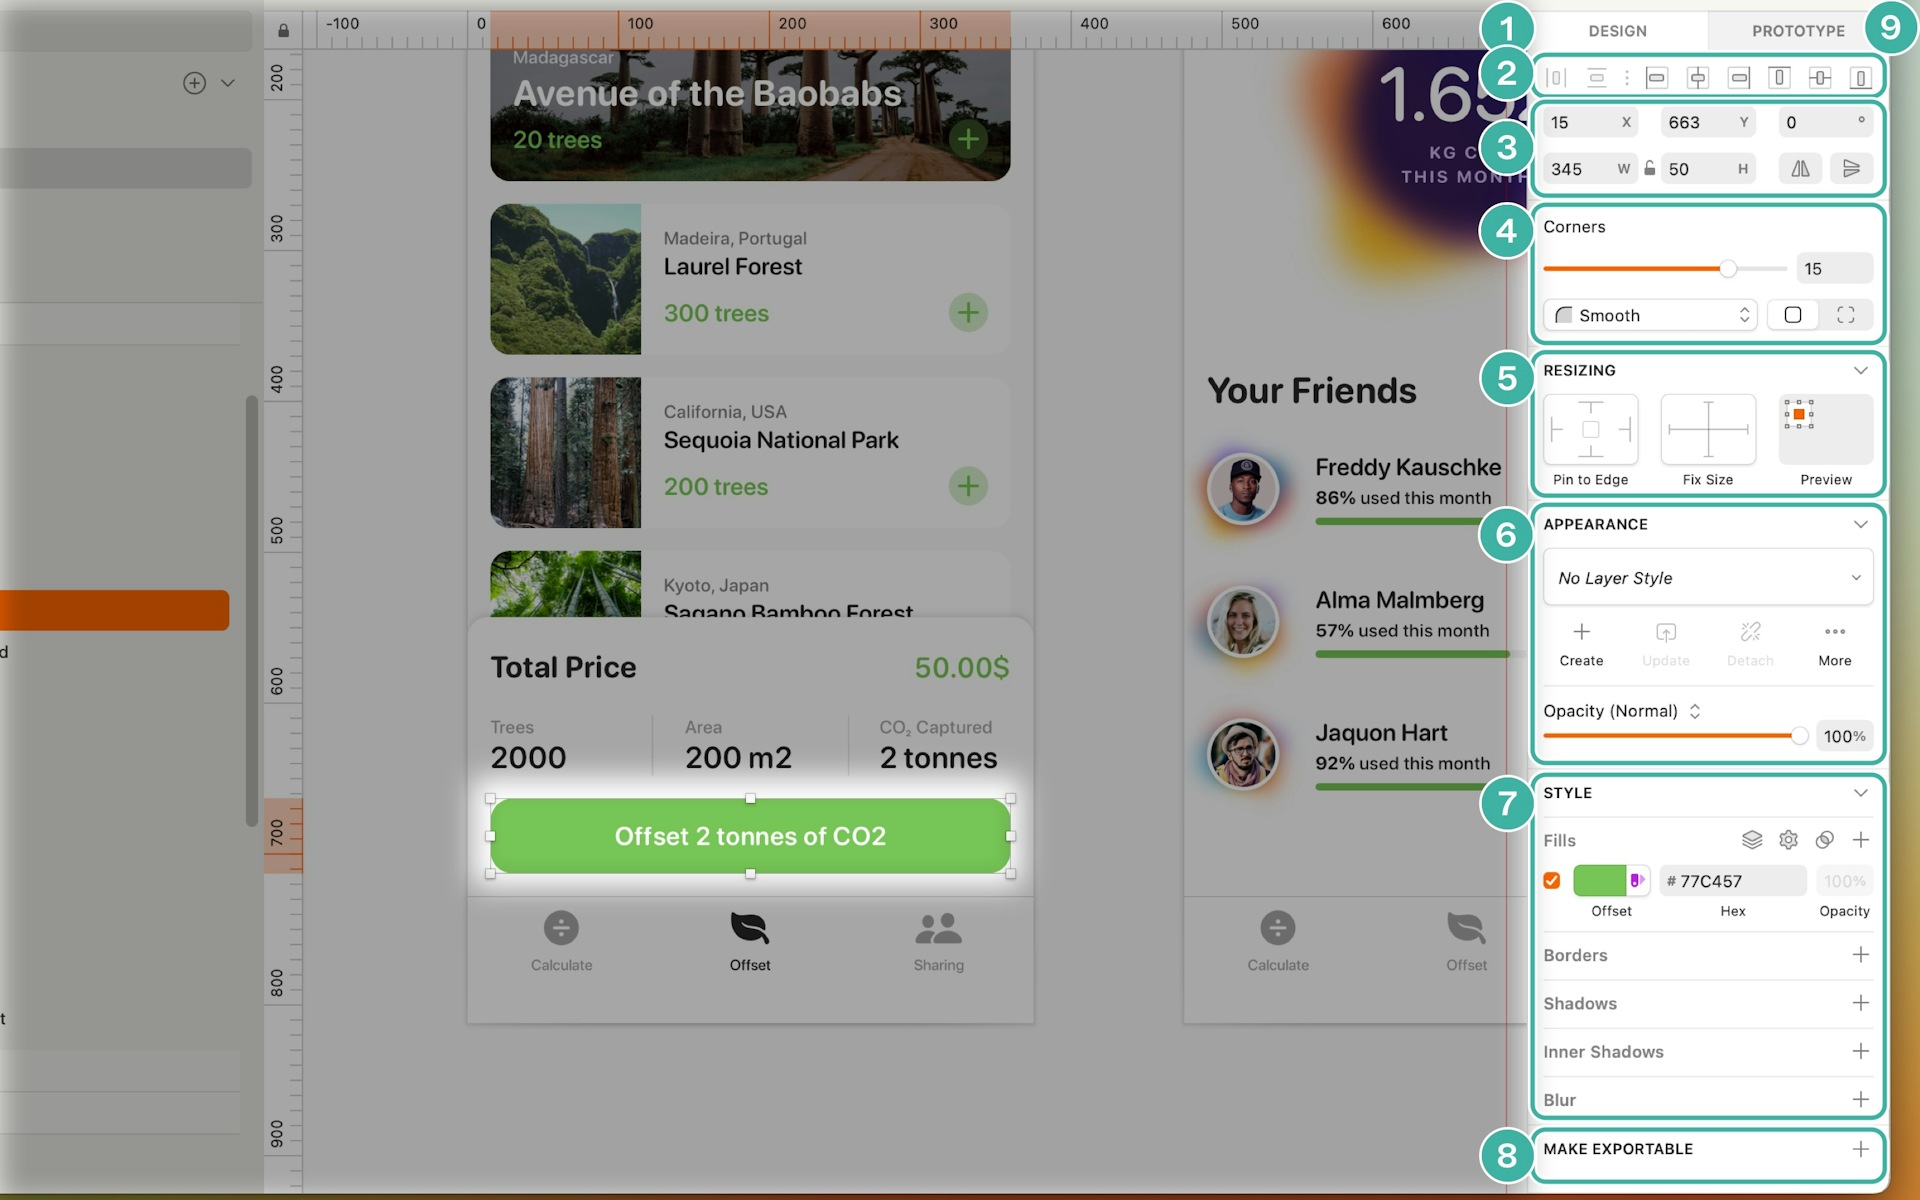
In the Inspector, you’ll find settings for any layers you’ve selected, or controls for the tool you’re using. The Inspector hides and shows these controls and settings based on what you have selected or what you’re doing.
Click anywhere on a section title such as Style to expand or collapse it — or add a new property, where that option is available.

Image showing the Inspector for a selected layer in the Mac app interface (v90 July 2022).
- The Design tab of the Inspector, showing the design attributes of the selected layer.
- Alignment options become active when you select one or more layers.
- Layer properties let you change the position, size and rotation of layers, as well as flip them.
- Corners enables you to choose to round or smooth corners in rectangles or squares.
- Resizing Constraints — you’ll see these properties if you’ve selected a layer within a group or Artboard
.
- Appearance controls apply, create, update, or detach your Layer Styles
as well as set your selection’s opacity.
- Style properties control how your layers look. To add a new Style, click the + button next to the section title for the Style you want to use (e.g. Borders). When you’ve added Styles, you can hide them by deselecting the checkbox next to them. To remove a Style altogether, deselect its checkbox and click the trash icon that appears.
- Make Exportable. The quickest way to export your work from the Mac app is to choose Share > Export… from the menu, or press ⌘⇧E, to bring up the Export dialog. Select the items you want to export, then click Export to open the MacOS Save dialog.
- Prototype tab allow you to add target Artboards
in your prototypes, animate your interactions and fix a layer’s position when scrolling.
You can also use ⌃⌘1 and ⌃⌘2 to toggle between the Design and Prototype tabs, respectively.